This tutorial aims to detail the tips and methods used at the Club for the assembly of buildings in “paper” kits.
The paper kits are easy to assemble at home. Buildings are sold as a kit in the form of cardboard sheets. It doesn’t cost a lot and it’s fun to do.
If you ask us, we will develop in more detail the techniques we use to facilitate assembly and improve the final look.
In this article we propose to describe only the basic technique that we have applied to the kits purchased.
- Preservation and Modifications of Printed Sheets which are components of the Kit.
We scan all the sheets of the kit in the JPEG format, making sure that the scanned sheet is complete. If this is not the case, it suffices to scan them in several parts so as to have a scan of all the drawings not truncated. Make sure that the scan has not changed the dimensions of the original sheet. Otherwise, change the format of the JPEG sheet until you get a sheet on which the parts have exactly the dimensions of those printed on the original sheets.
The advantage of this operation is to have basic drawings that can be reproduced or modified at will as needed. As for example, reprinting windows, shutters and even walls or parts of walls if the original is damaged due to clumsiness or assembly error.
The other advantage, and not the least useful, is to be able, from the new printed sheets, to make blank assemblies to understand the technique and to check that we have understood how to fold, position and glue. This also makes it possible, if one hesitates, to determine what is the optimum thickness, and therefore the rigidity, of the paper for the assembly that one wishes to make.
The prints can be made on A4 sheets of different thicknesses depending on what you want to do with them. We use 120g paper and up to 330g.
B- Manufacturing and assembly techniques and tips
In some cases it may be interesting not to use paper parts but to make it identically in the most suitable material (or available in an surplus parts box). For example, to make the foundations of certain buildings, we remake parts from imitation stone wall plates (or others depending on the case). It is at the same time more solid, it is possible to paint and skate them, and above all it gives a relief that the paper does not allow.
It is better to build the model on a hard base (Forex 2 ou 3 mm thick) which will ensure better rigidity of the building and better resistance over time.
Different manufacturers sometimes have different assembly techniques. Depending on the type of building, the size of the parts and the ease of cutting and assembly vary greatly. It is difficult to give valid feedback on all kits. It is up to everyone to adapt their techniques to the result they want to obtain.
For example :
- If you want to build a stronger and more resistant building over time, laminate the back of the walls with cardboard (cardboard for frames) or 2mm Forex. The possible cutting of doors and windows will be made when the two parts are glued.
- To give more relief, cut out the location of the doors and windows if this is not planned. It will be necessary to make new doors and windows and glue them in place, set back from the facade, the cardboard or laminated Forex (see 1) allowing to represent the thickness of the wall. Ditto for the shutters that are repositioned in relief on the facade on each side of the windows.
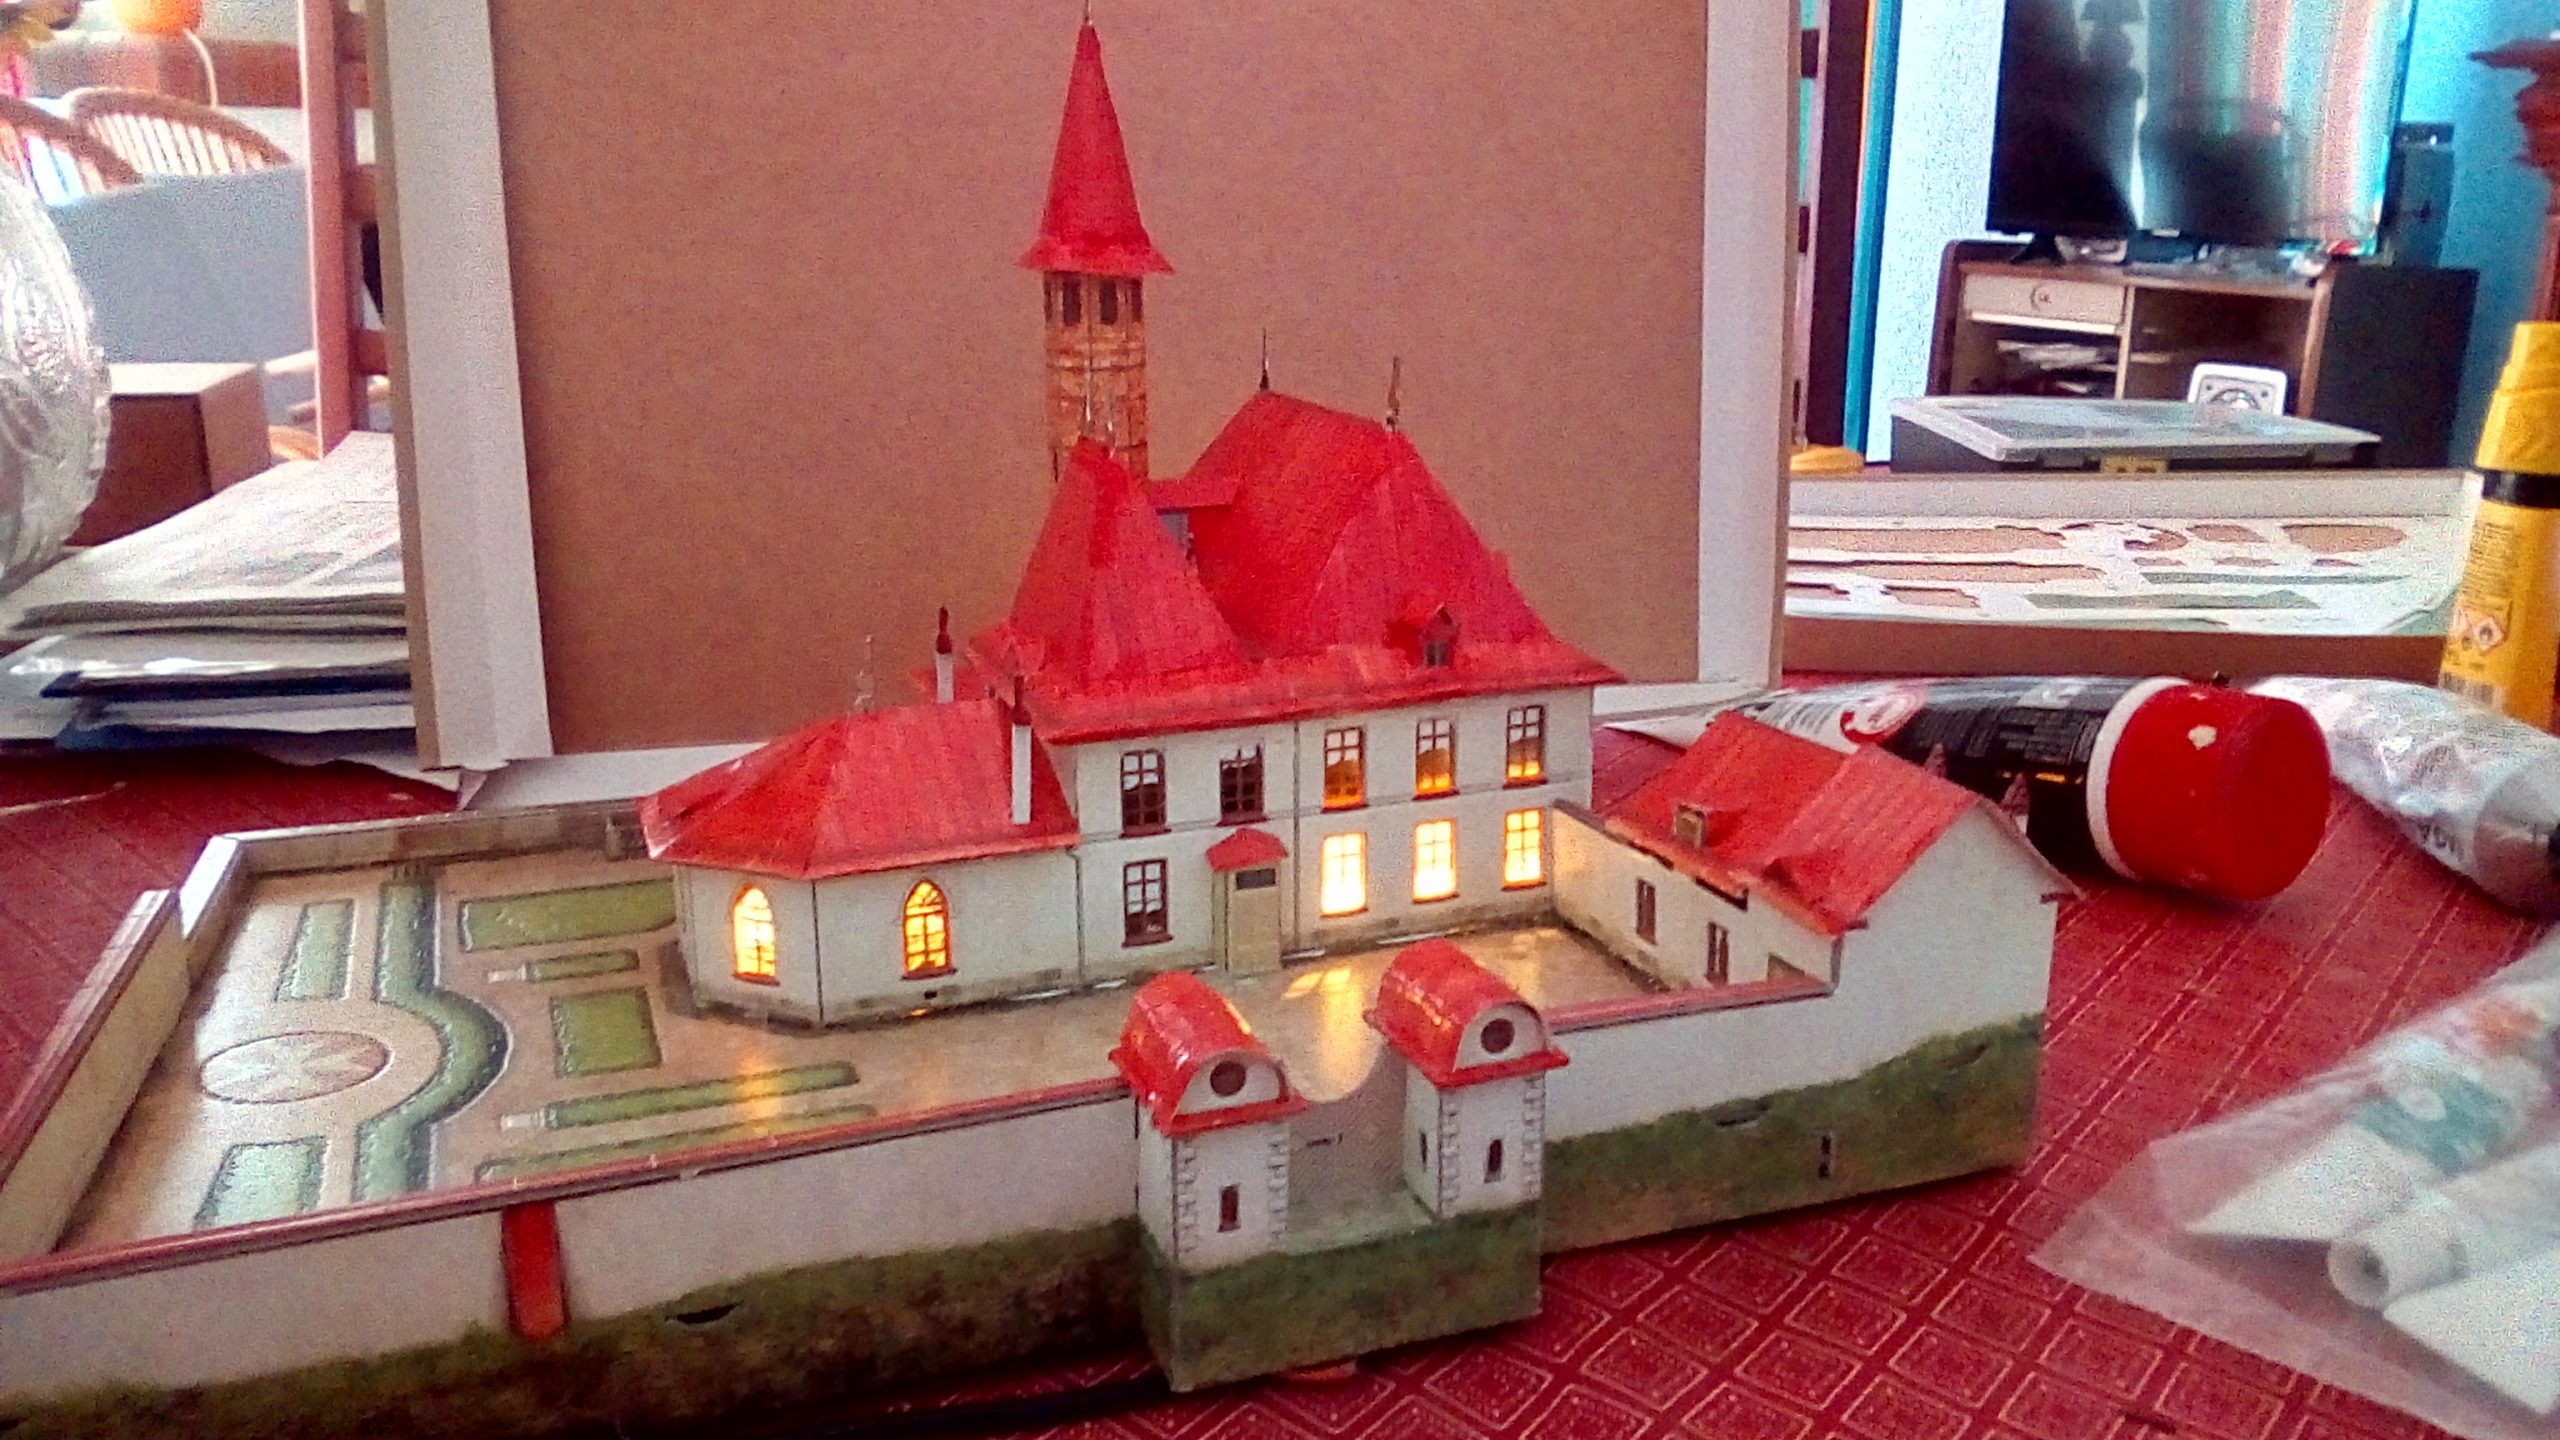
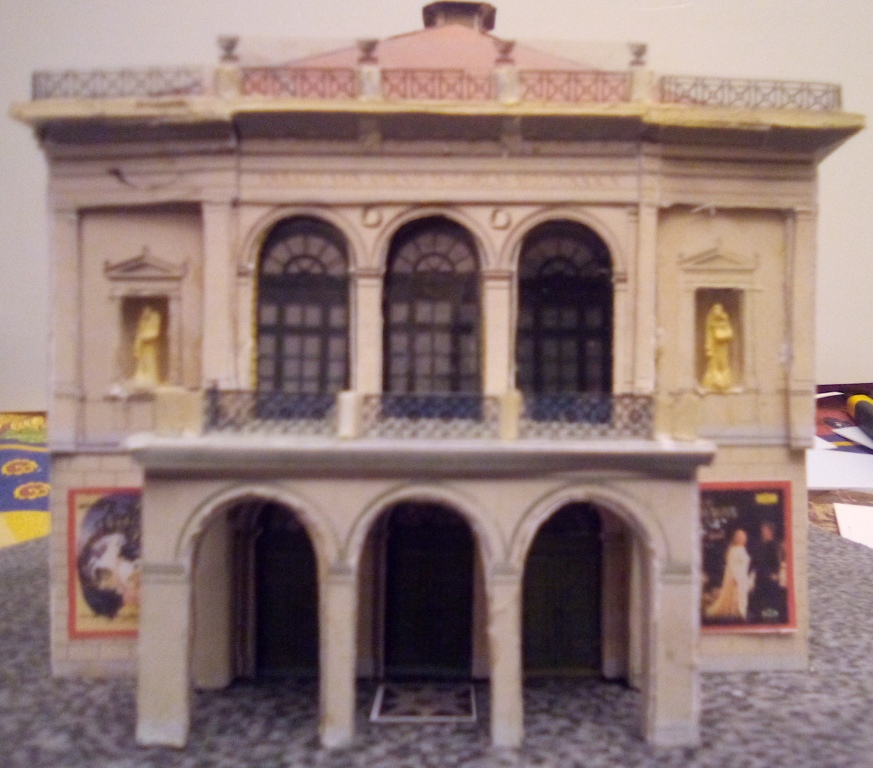
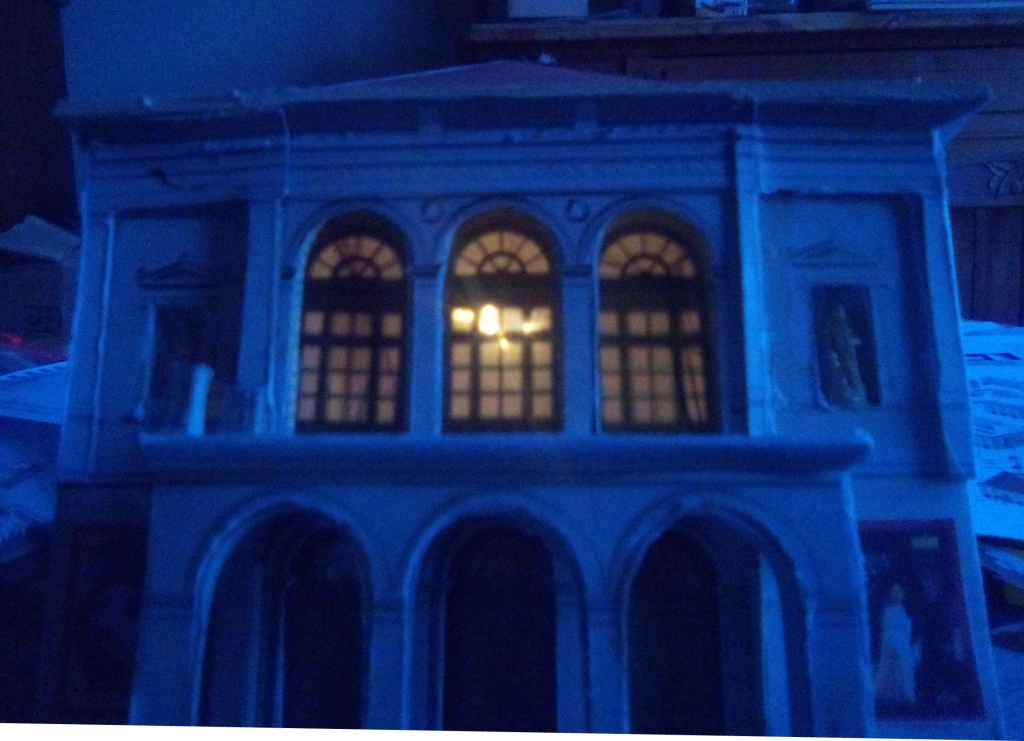
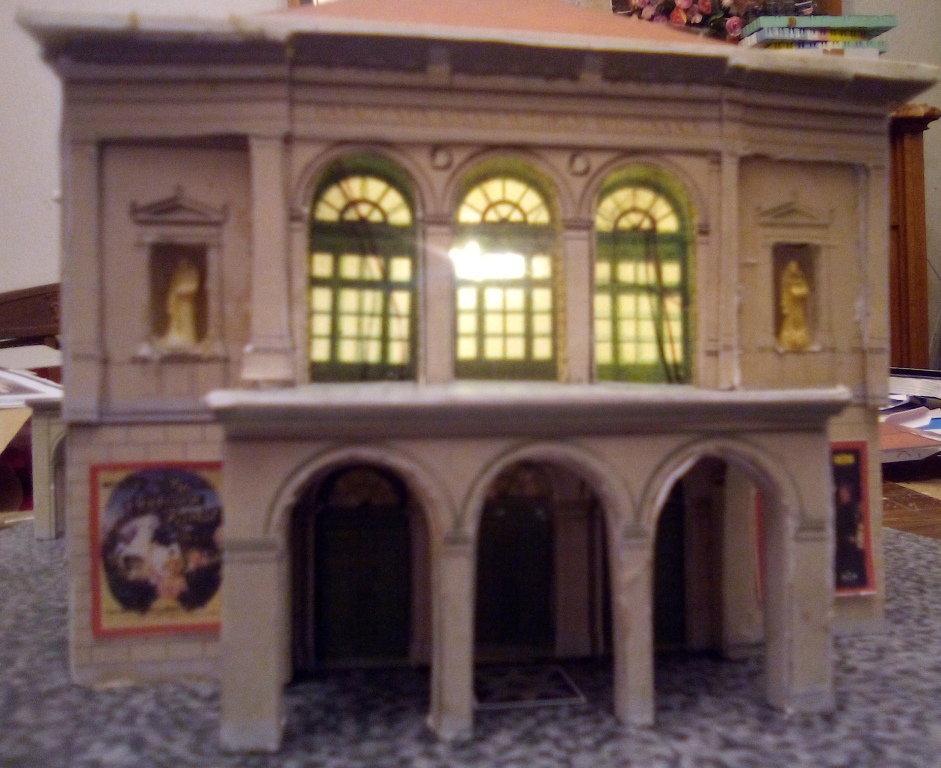
- It is possible to illuminate the interior. It is necessary, if it is not available in the kit, to print or manufacture doors and windows with transparent panes. The detail of this production is a bit long to describe here. If you are interested, contact us. In the basic version, one lighting point can be sufficient for the whole building. We light our buildings (including plastic kits on the market or manufactured “Club”) in making a “luxury” version, each room being partitioned and equipped with one or more SMD1206 LEDs. The color of the LED is adapted to each room, warm white in general, cold white to simulate neon lights (kitchens, bathrooms, etc.). For example for the large hall on the 1st floor of the theater (photos below), we chose a “luxury” option and invested in a Venetian chandelier made with 10 warm white SMD 0402 micro-leds.
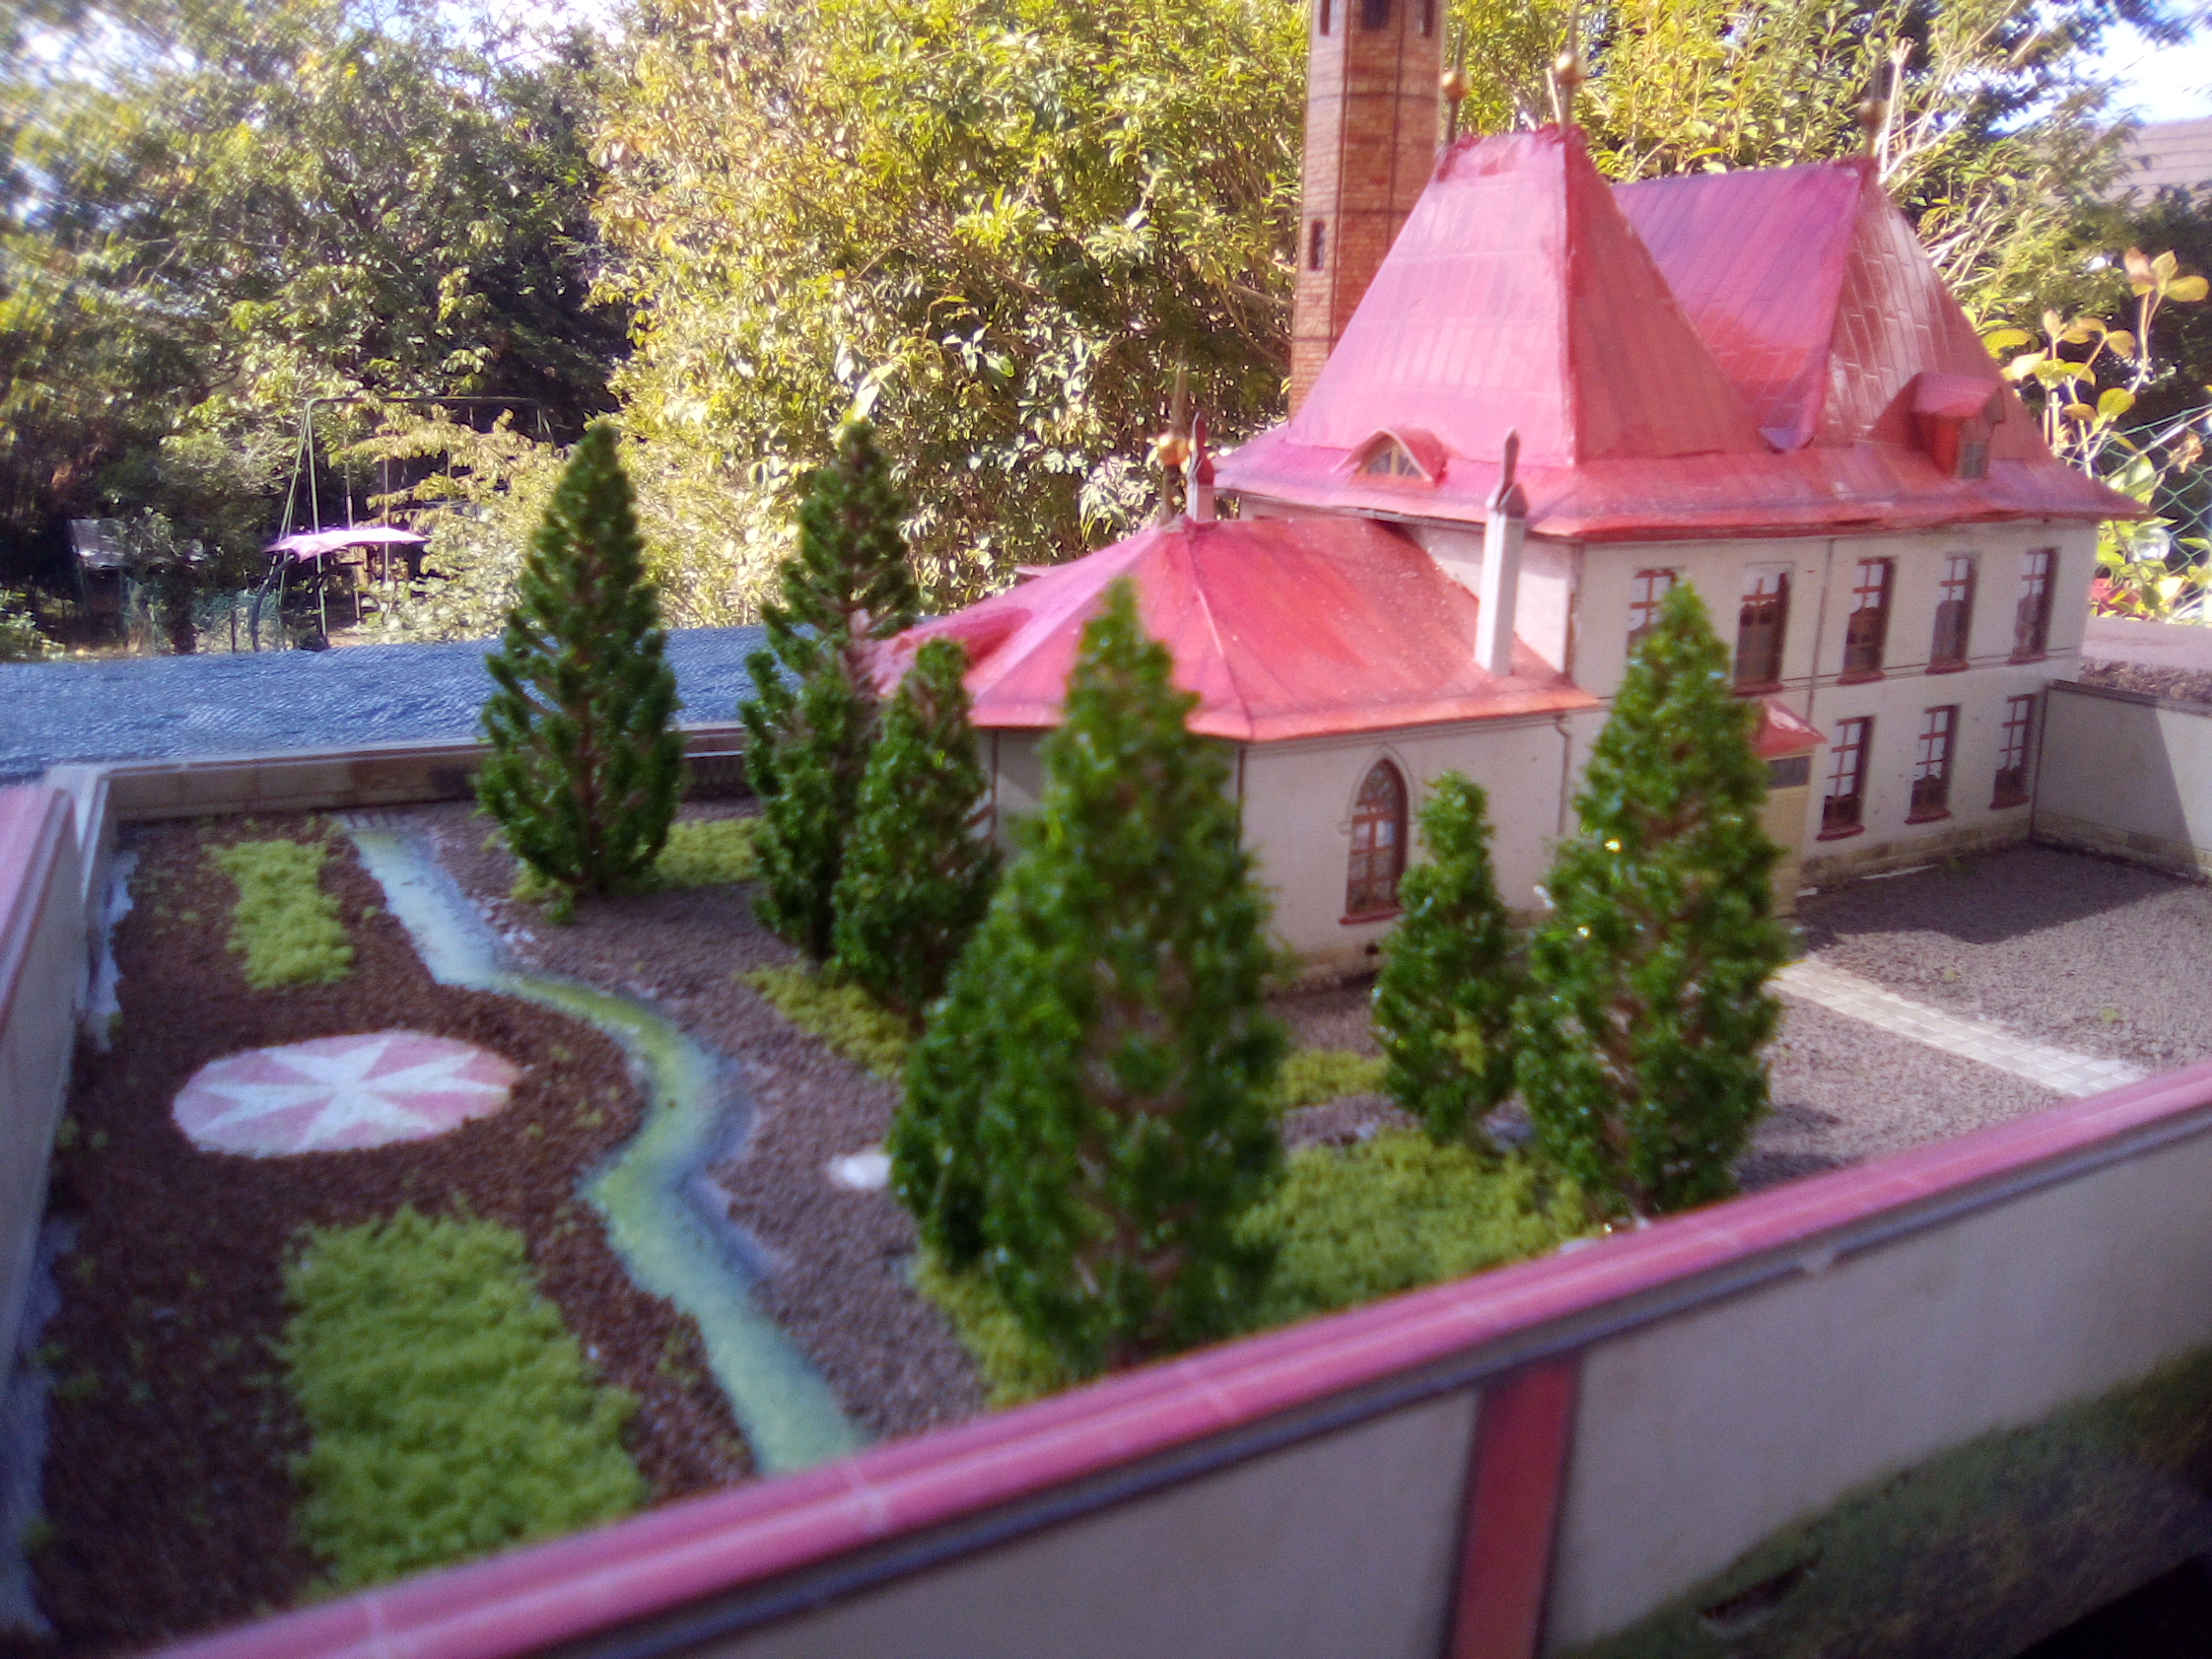
- When vegetation images are printed on walls or grounds, the final appearance of buildings is greatly improved if these images are covered by gluing real vegetation ( trees, shrubs, grass, etc.) that every model maker has in stock.
- Do not hesitate to adapt the construction to the technique that you master the best. If you do not want to make a model exactly in line with reality, do not follow the manufacturer’s assembly diagram to the letter and adapt according to your tastes and possibilities. – In the theater kit, the statues and their niches on the facade are printed without relief on the wall. The manufacturer offers a basic 3D version by gluing a piece of rolled paper simulating the niche and 2D paper statues therefore without relief to glue in place. We therefore made niches taken from a 1/3 ABS tube cut to the right dimensions, and statues taken from the stock of repainted characters (1/200 scale) which are more aesthetic. – The guardrails and passageways provided in paper in the kit have been replaced by photo-cut brass guardrails. The gold color has been preserved, as can be found on the facades of many theaters and opera houses.
- On the theater, the roofs thave more volume by adding lightning rods (plastic toothpicks) adorned with golden balls which were also used to replace the paper basins on the facade cornice.
- The theater building is divided into 10 independent volumes, individually lit. There are 11 lighting functions controlled by an Arduino. The lighting was made using 3mm warm white LEDs for the interior spaces and SMD 1206 LED’s for the exterior lighting under the entrance porch. We had fun giving the touch of standing to the large foyer (Facade, on the 1st floor) by making a large Venetian chandelier made up of 10 micro-Led’s 0402.
If you send us requests to improve or complete this tutorial, we will make the wished update.
We will be happy to answer your questions and suggestions.
The following photos give an overview of the first buildings built:
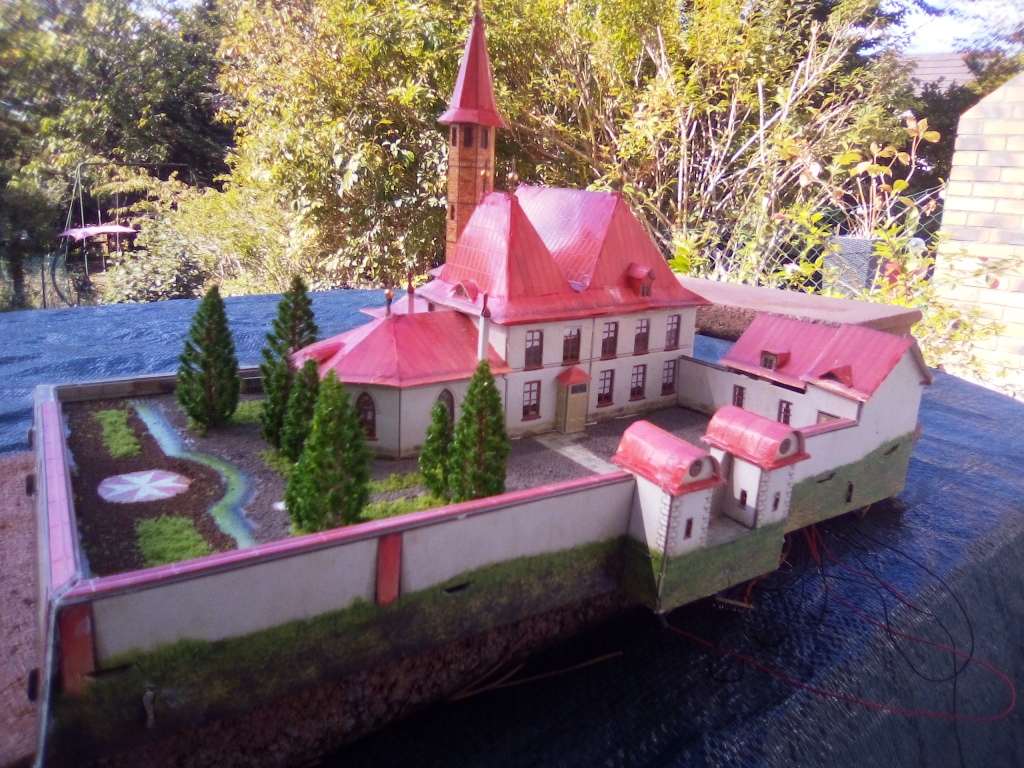
Priory Palace in Gatchina (Russia)
Details:
- Manufacturer: The Clever Paper
- Scale: 1 / 150th
- Reference: 344
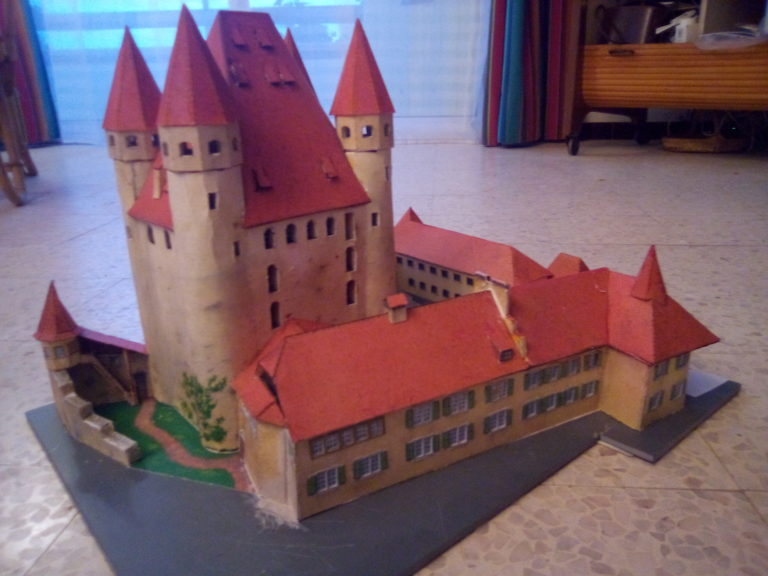
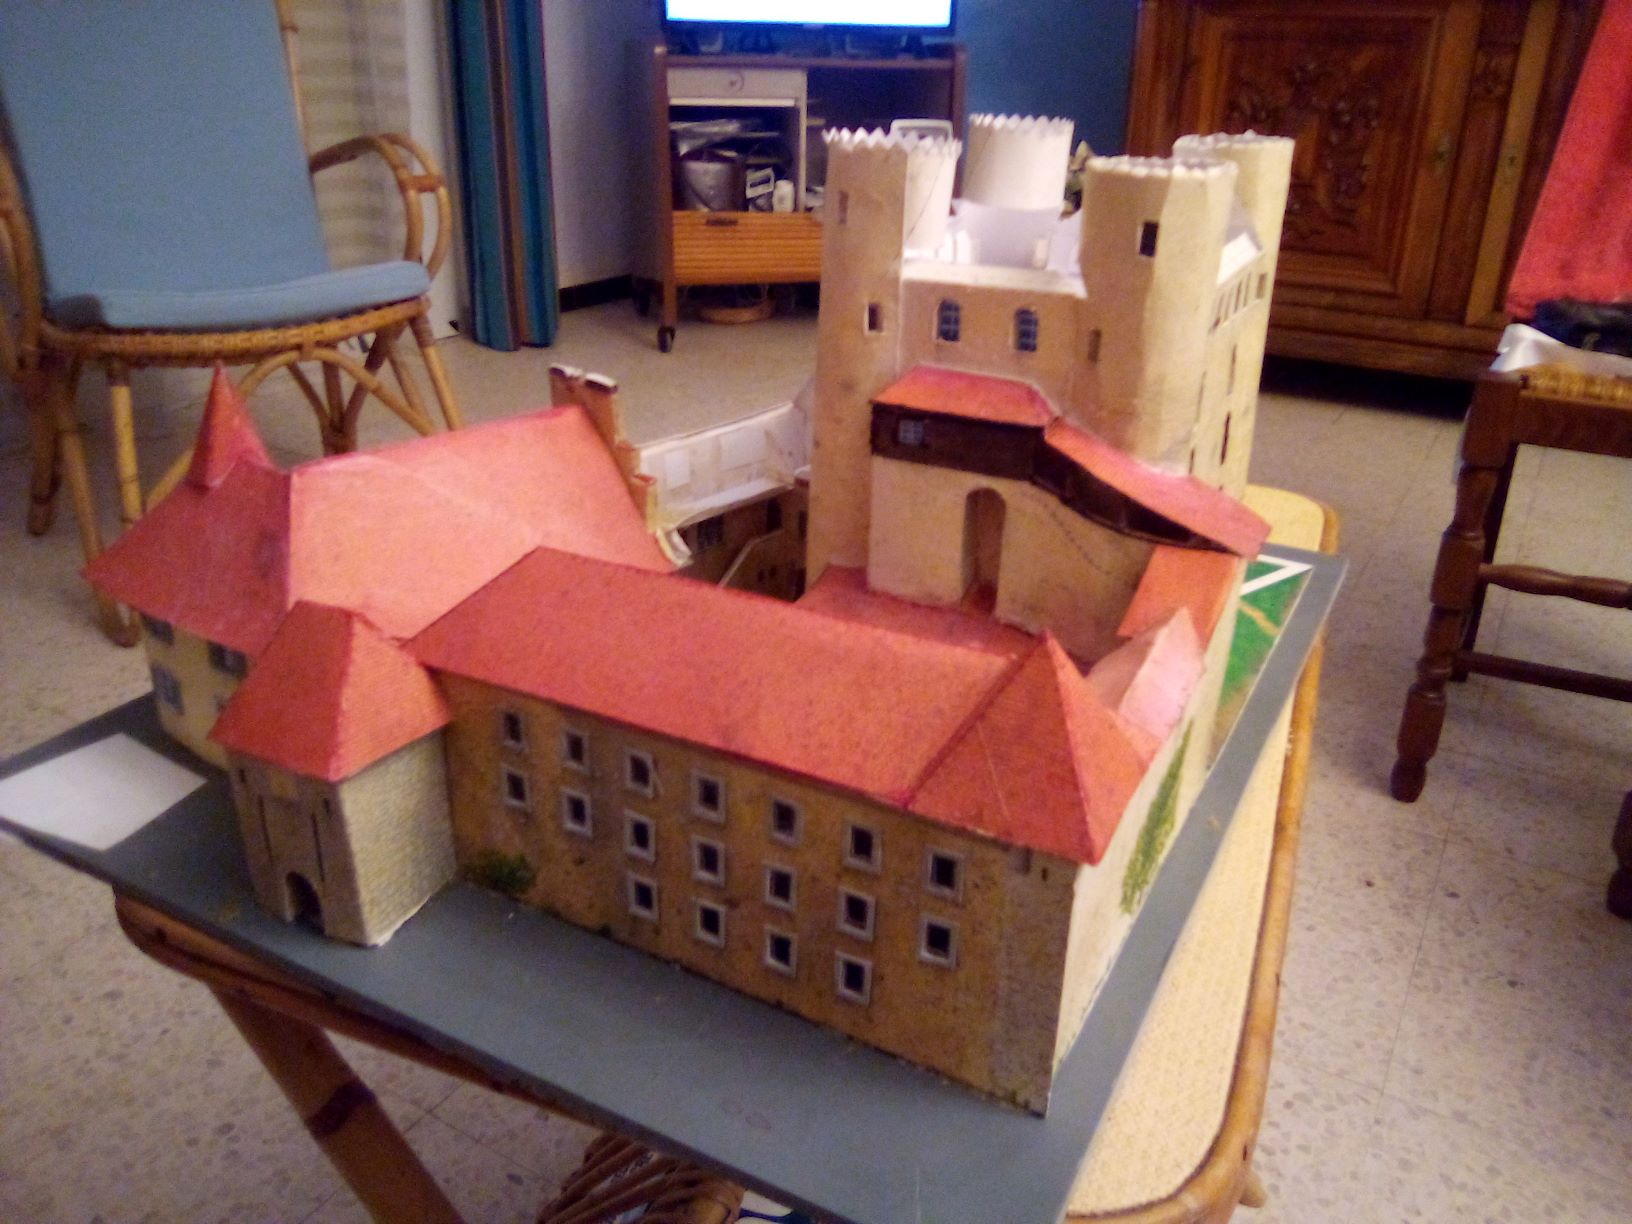
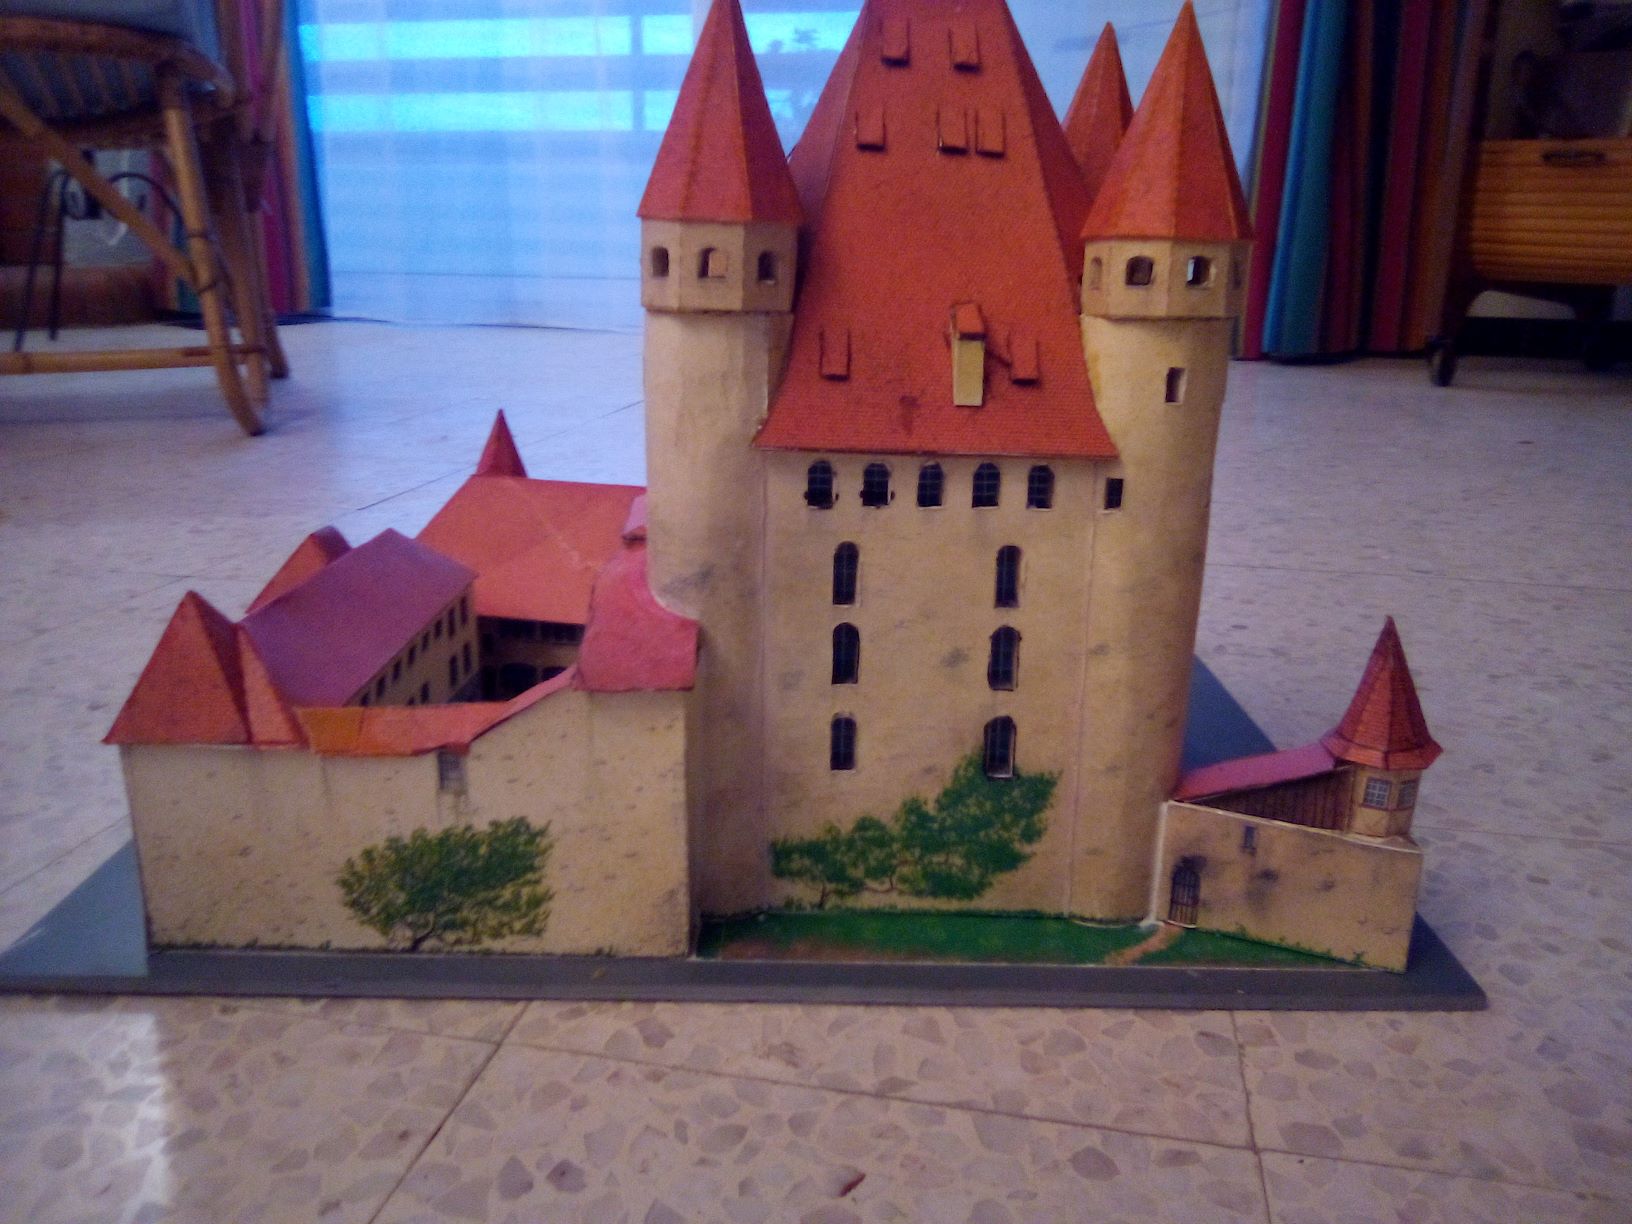
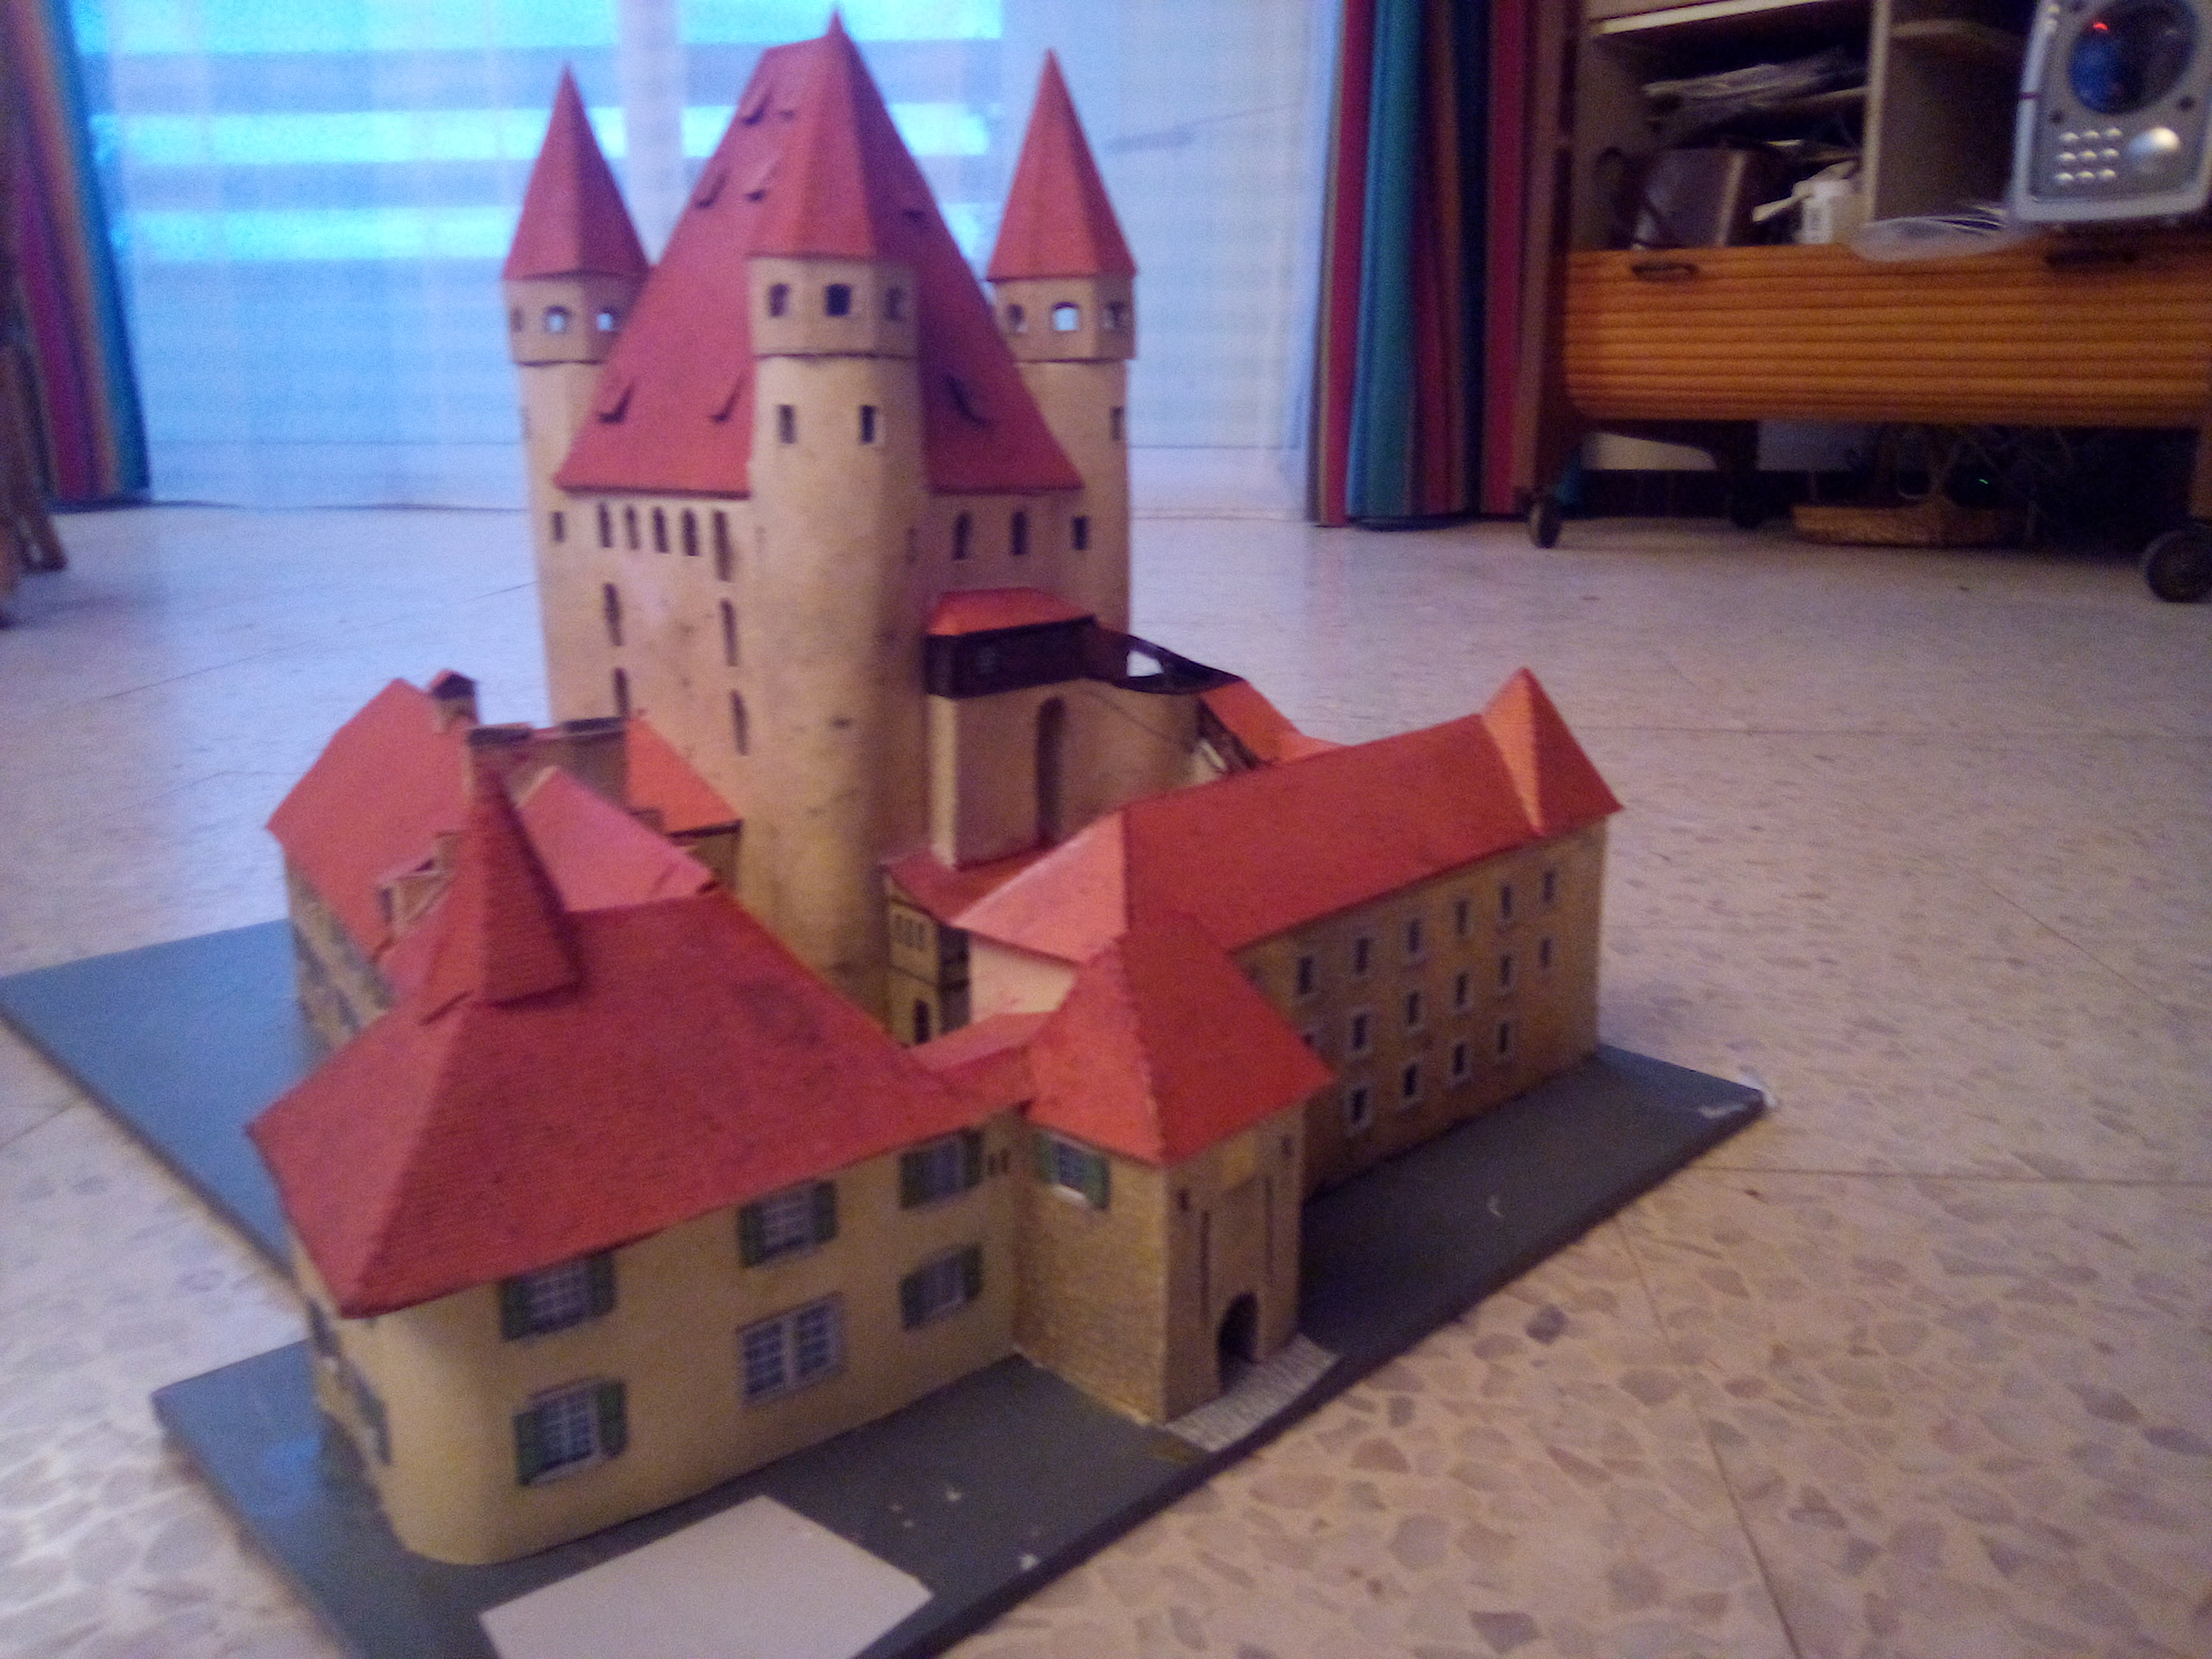
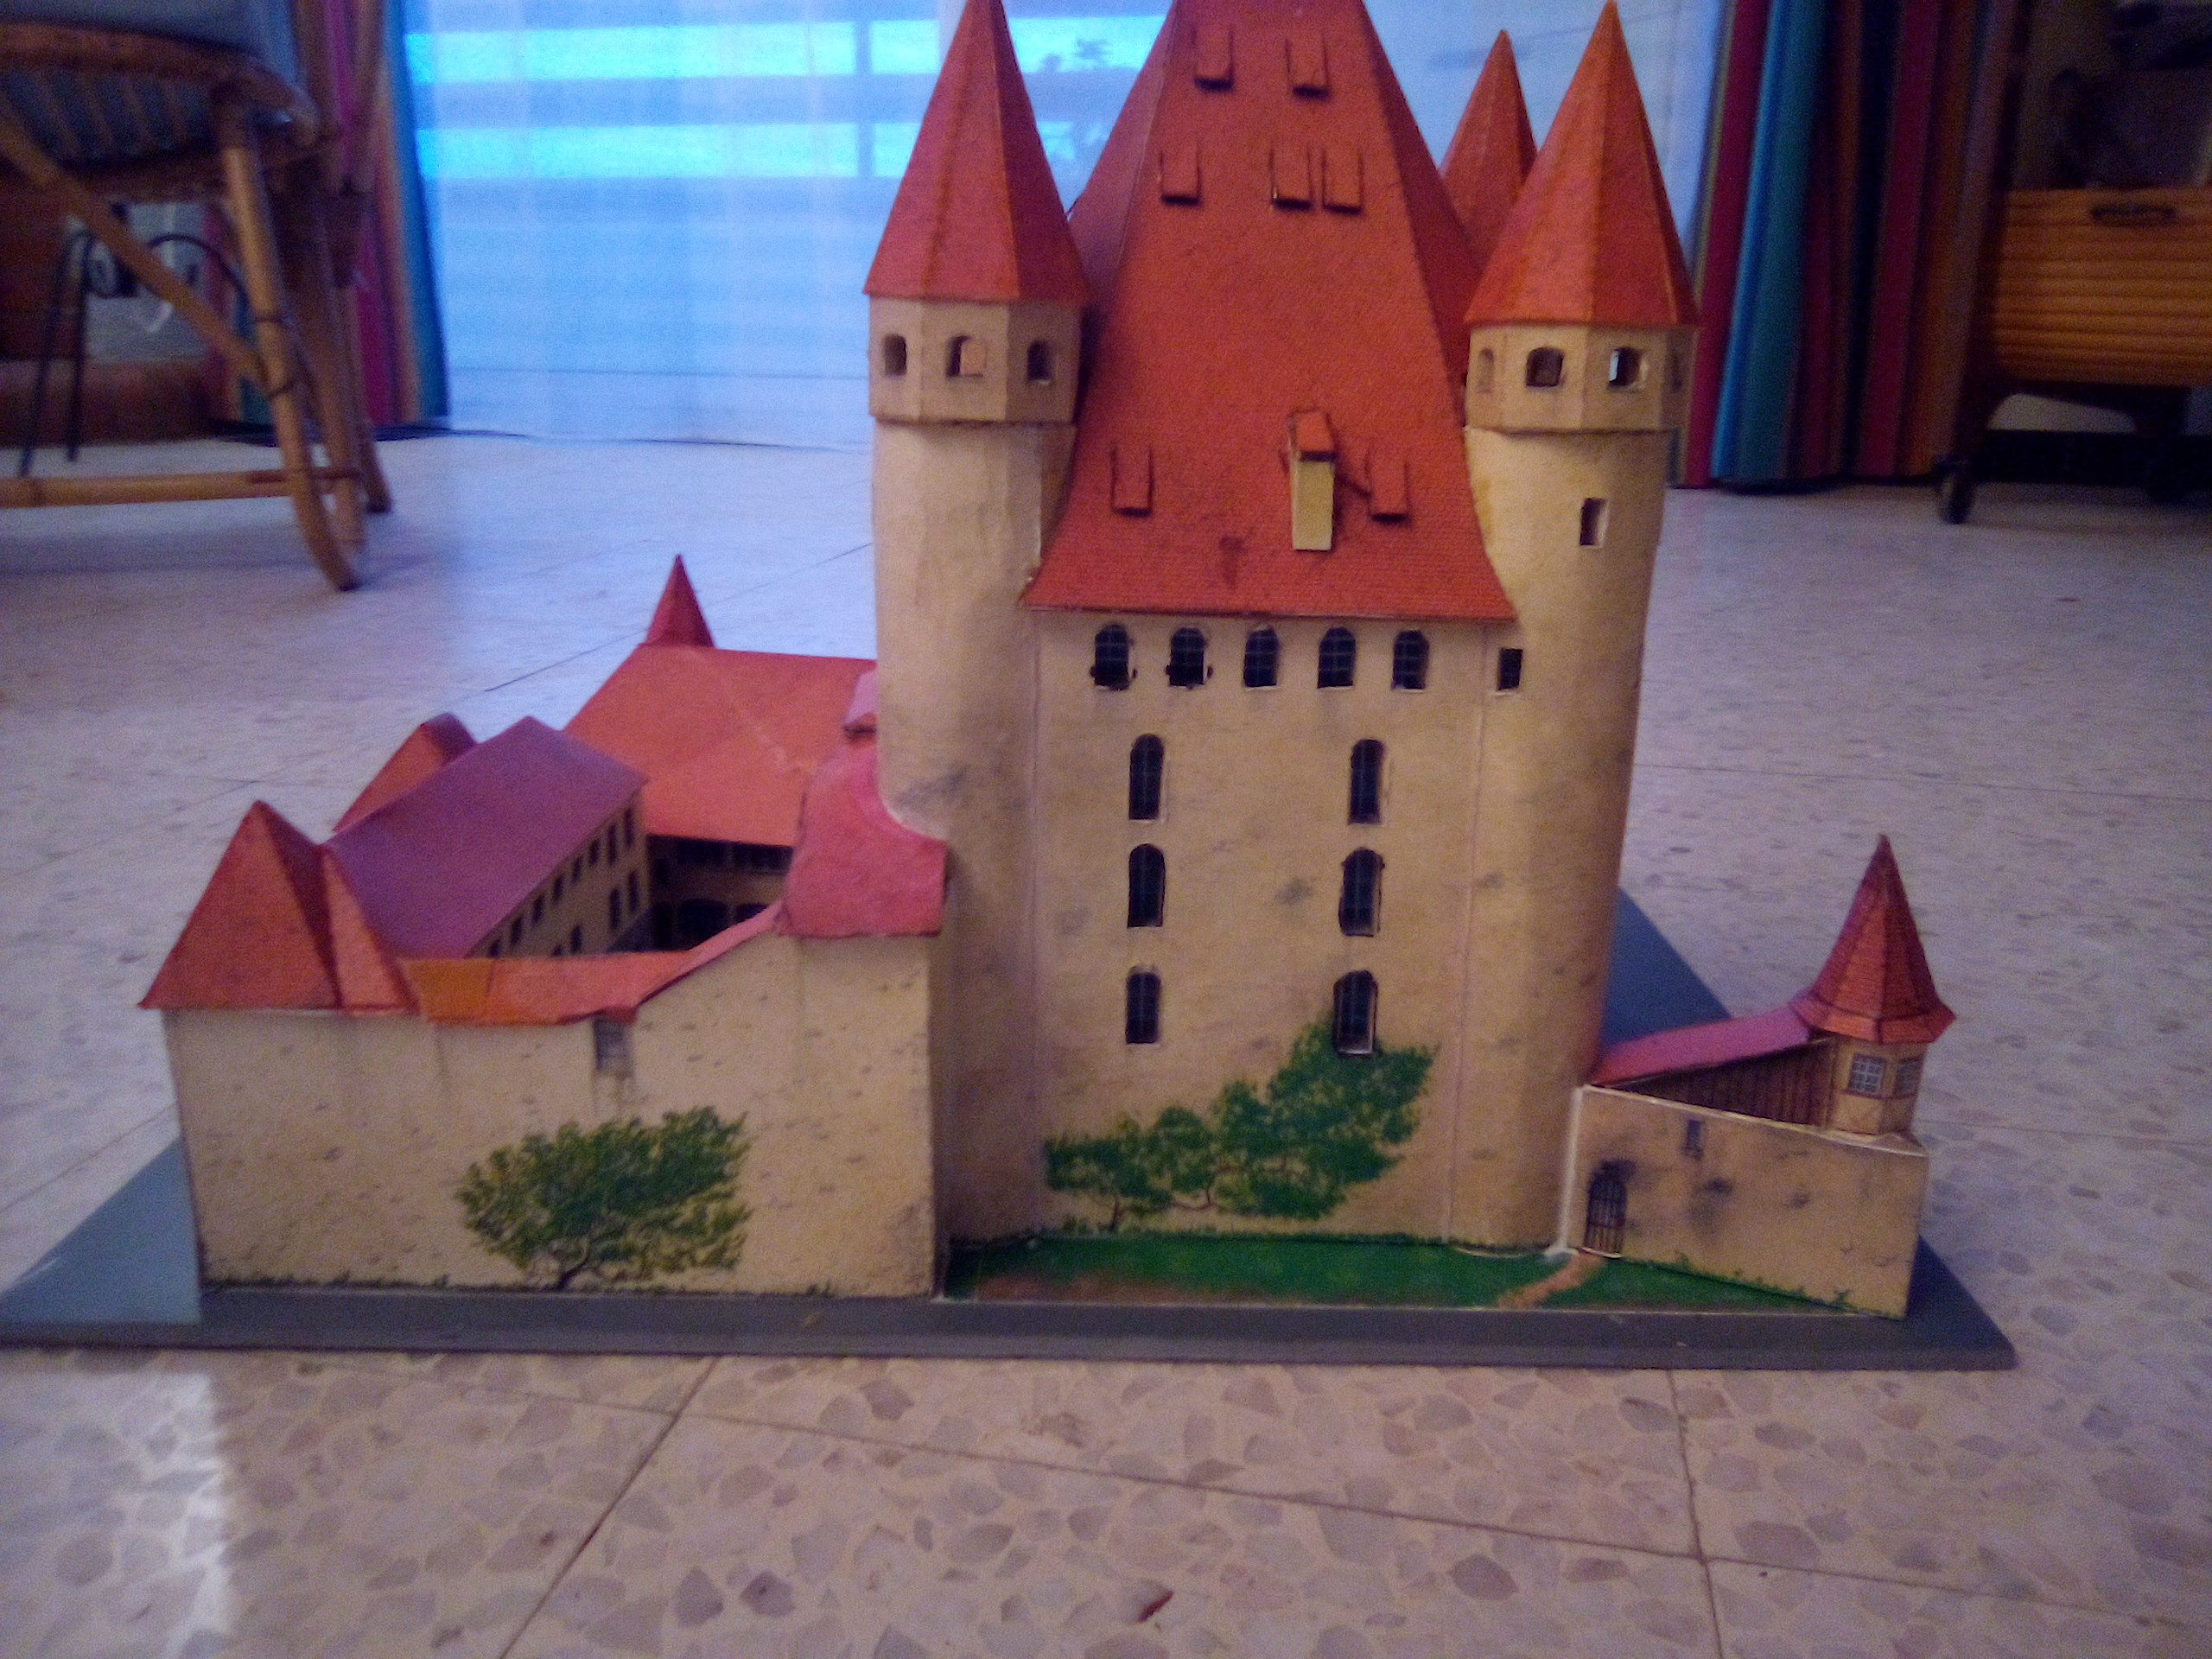
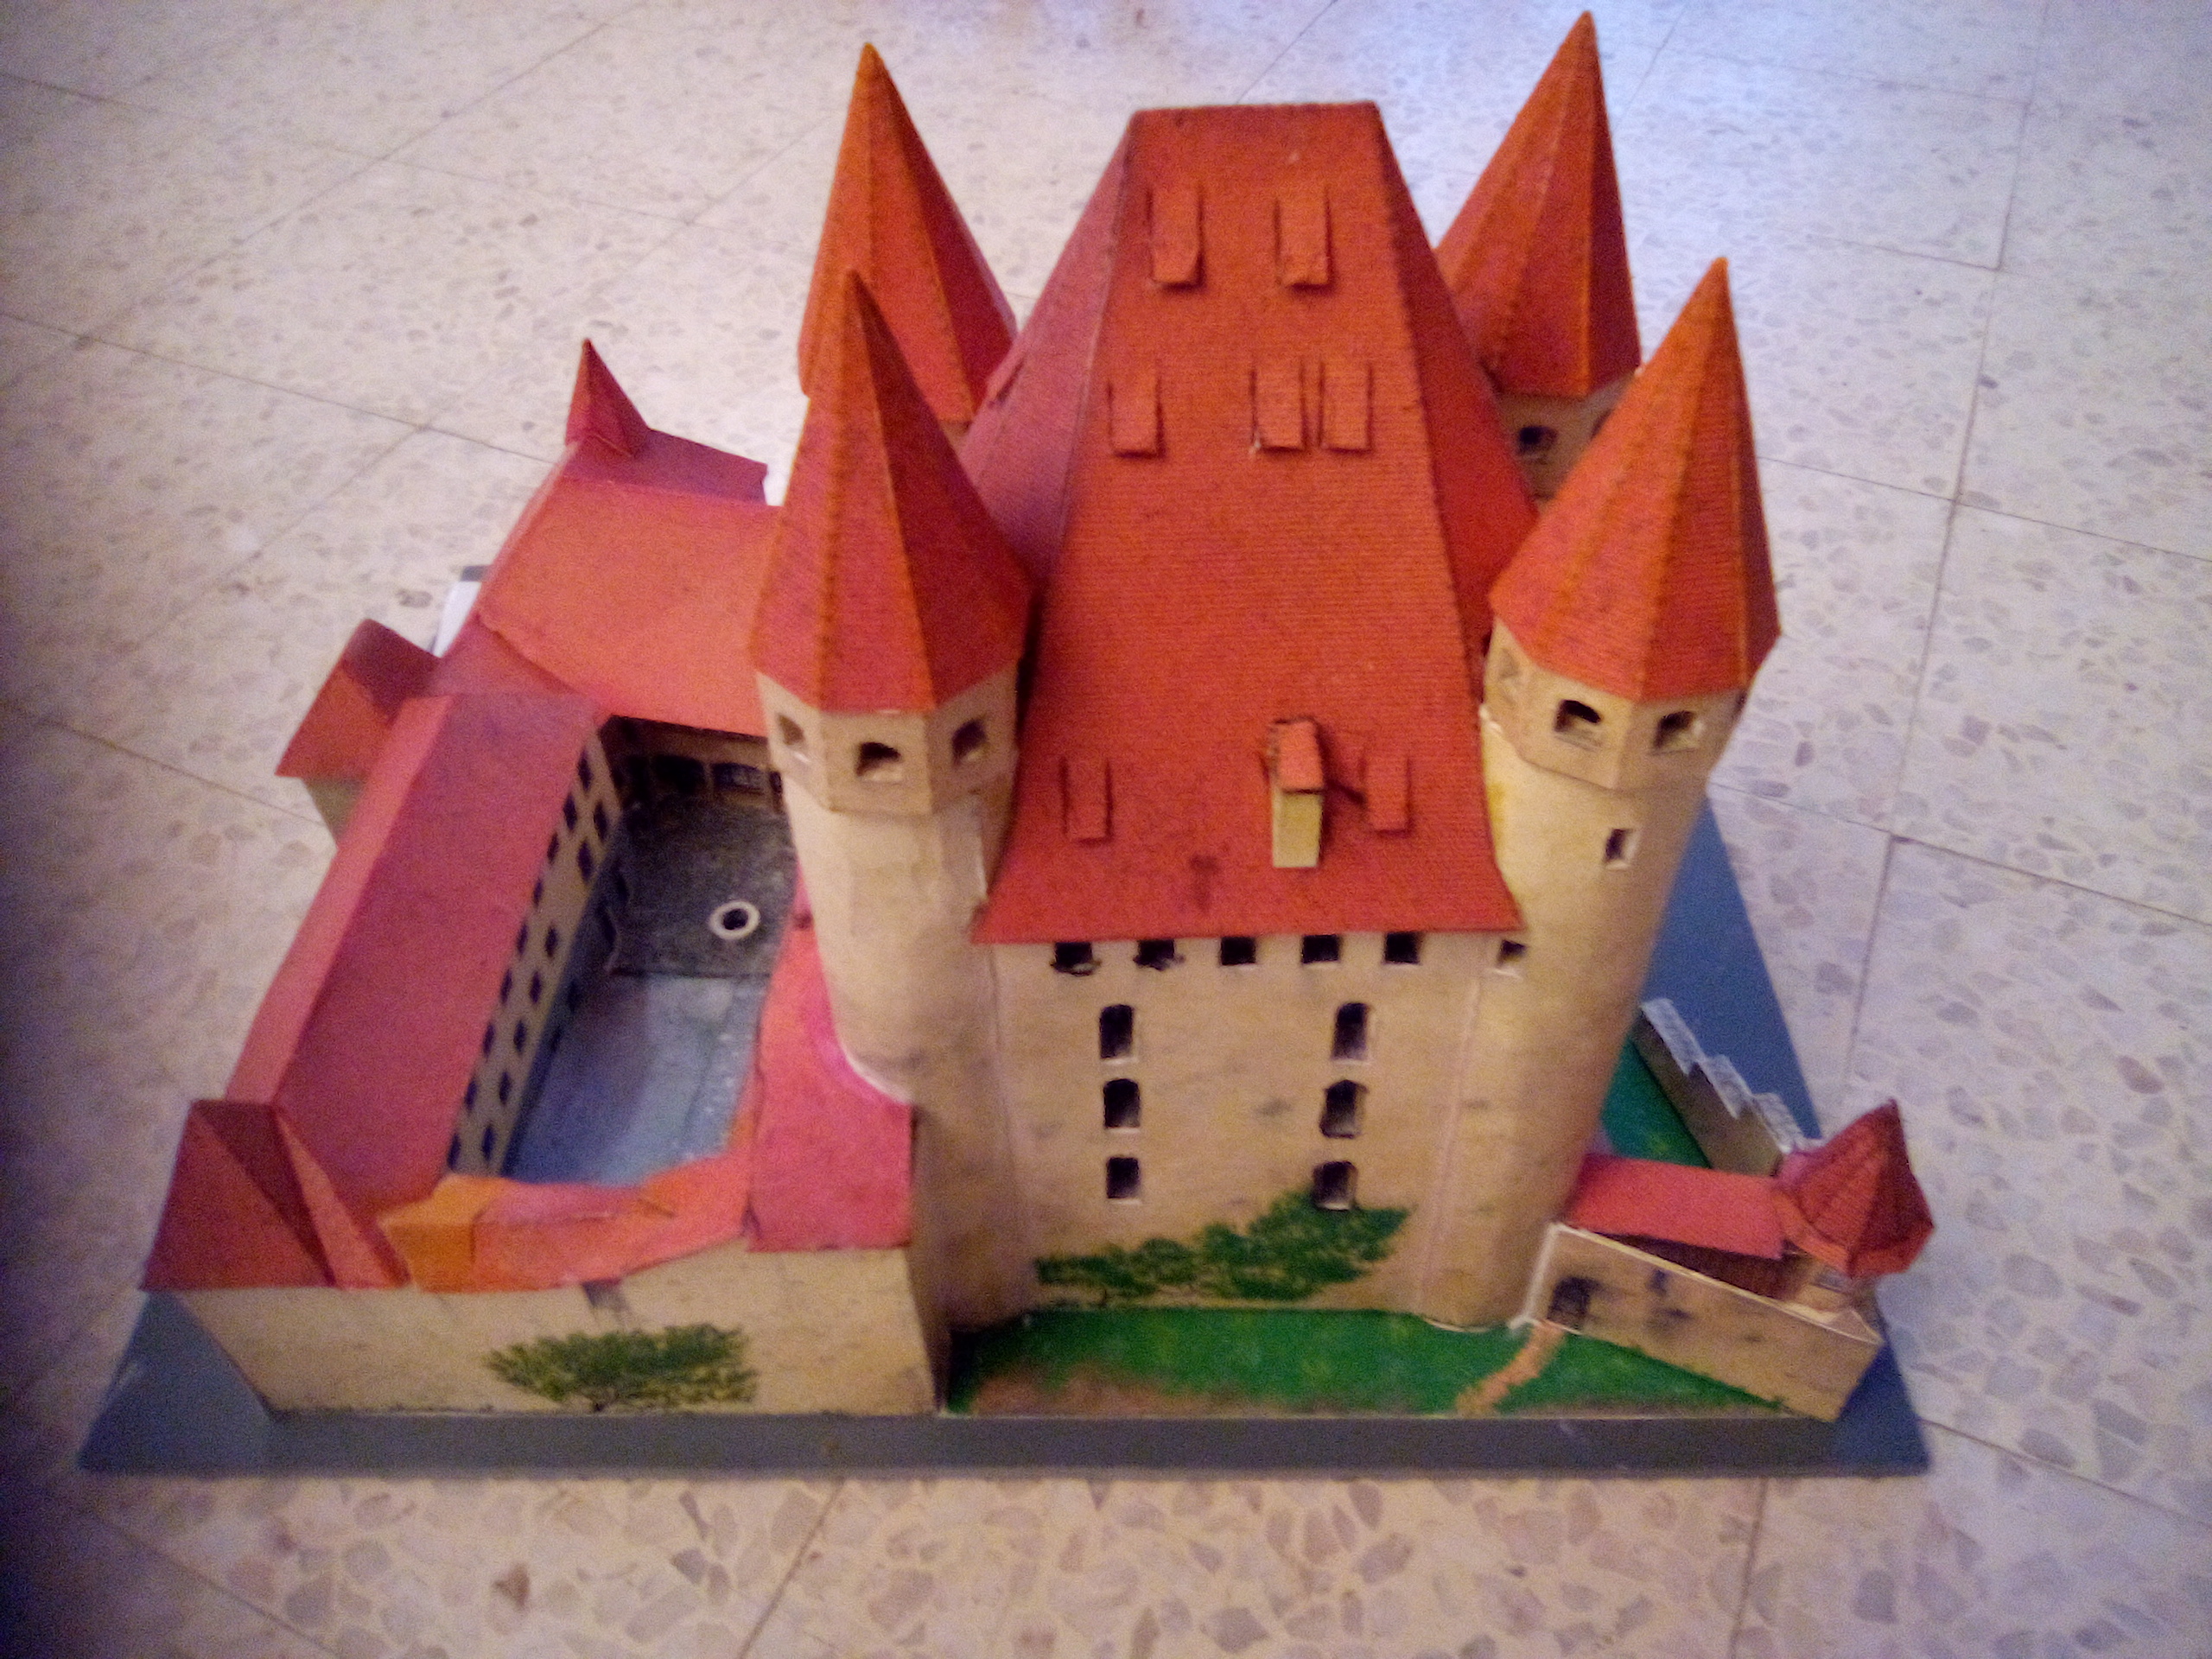
Thun Castle
Details:
- Manufacturer: Schreiber-Bogen
- Scale: 1 / 160th
- Reference: 72396


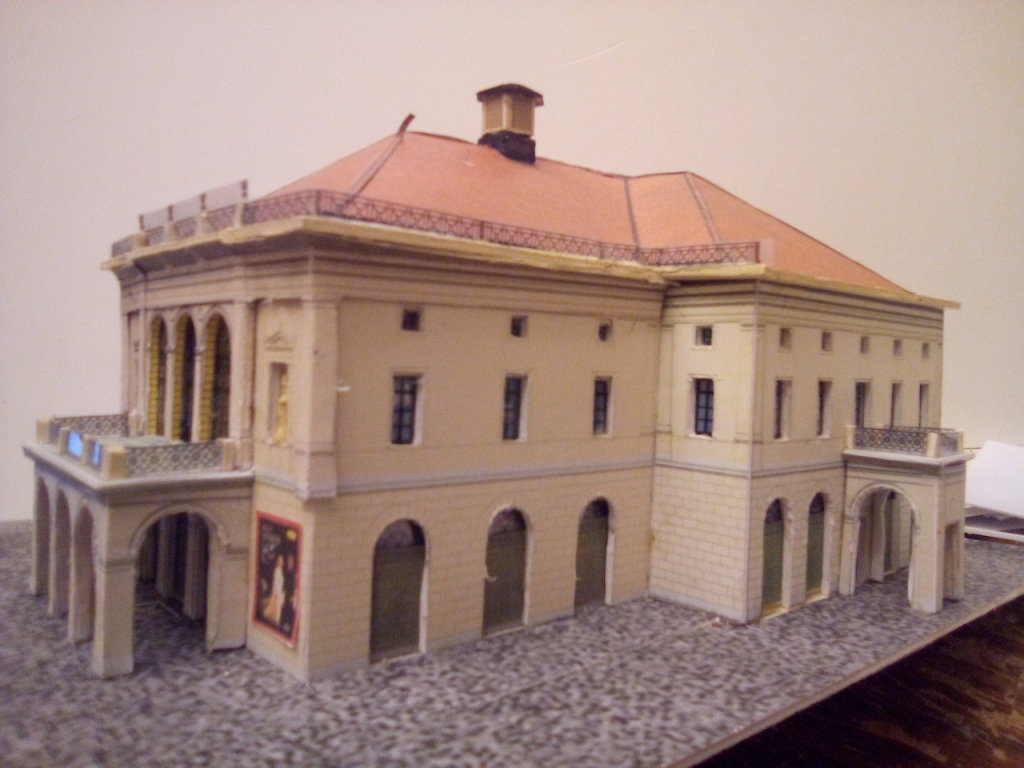
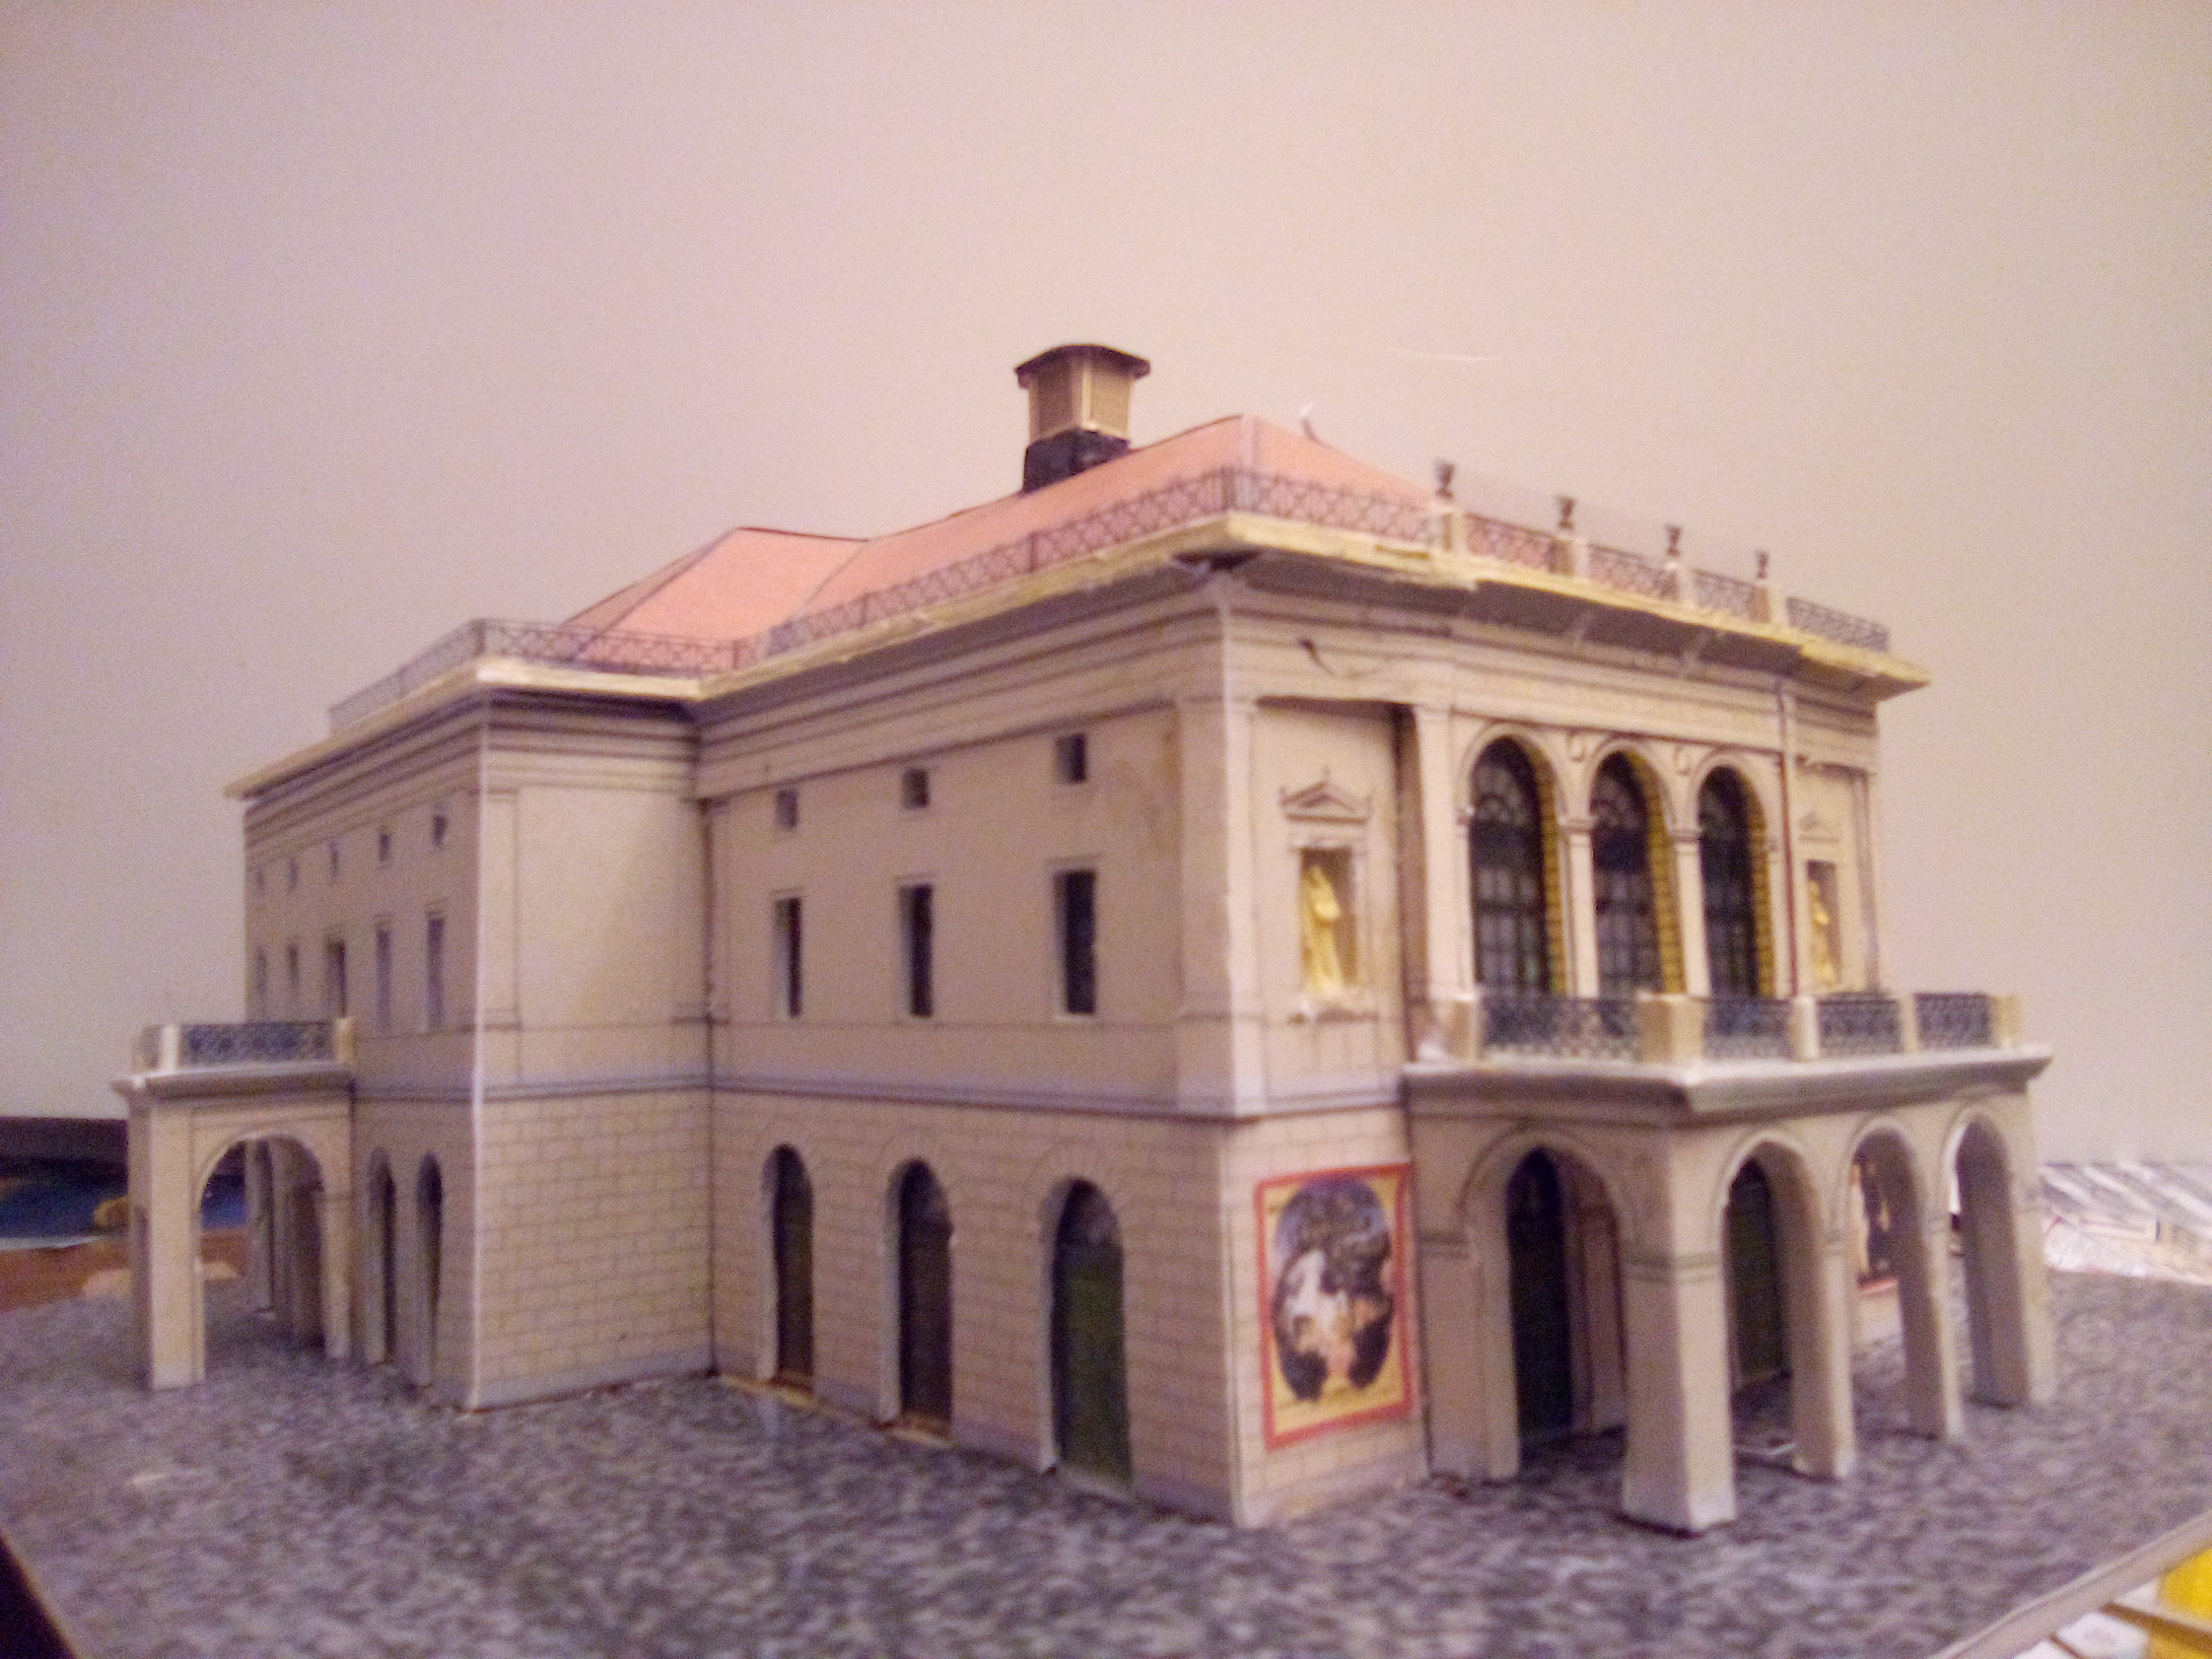
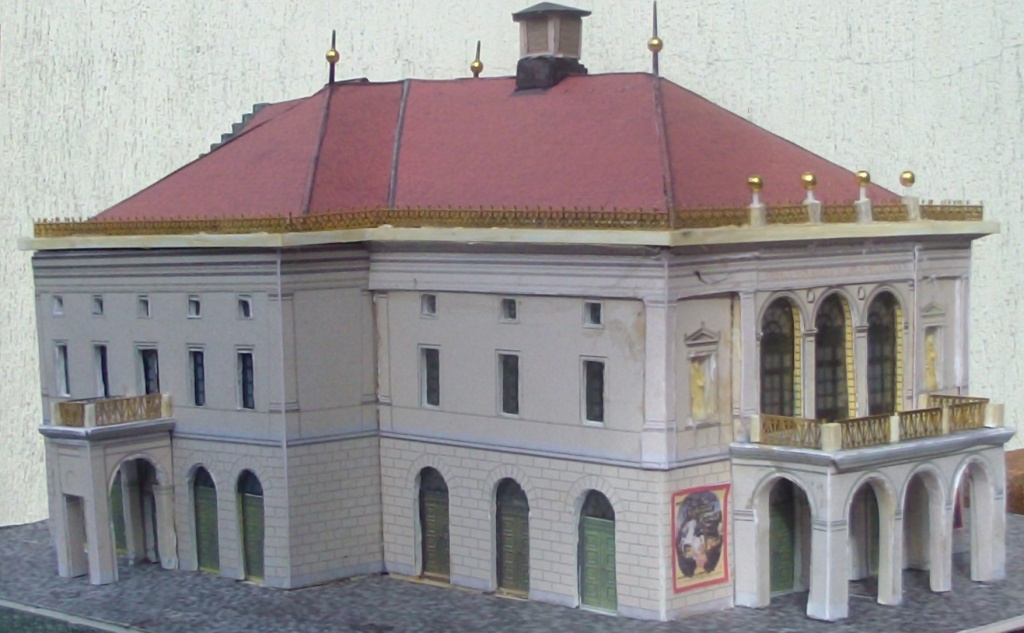
Wilhelma-Theater in Stuttgart
Details:
- Manufacturer: Schreiber-Bogen
- Scale: 1 / 160th
- Reference: 674
